
11 Pro Tips to Instantly Elevate Your Golden Hour Photography

The long days of summer offer a unique advantage for photographers: an abundance of golden hour light. This seasonal extension of the coveted ‘magic hours’ provides more time for photographers to work with the soft, beautiful light that can transform a scene. Adobe Lightroom and Sony Ambassador Colby Brown shares with PetaPixel his process of mastering this unique light, providing practical techniques for both in-camera capture and post-processing.

Full disclosure: This article was brought to you by Adobe
For Colby Brown, a full-time travel, landscape, wildlife, and humanitarian photographer, the pursuit of golden hour light is less about technical perfection and more about narrative potential. He sees the golden hours as a tool for telling a more profound story. “Golden hour isn’t just about warm light; it’s about a fundamental shift in the world’s personality,” Brown explains. “The harsh, direct light of midday gives you facts, but the soft, directional light of sunrise and sunset gives you feeling. It gives you a mood. That’s the foundation of any good story, and as a photographer, that’s what I’m always chasing.”
However, Brown is quick to acknowledge that the fleeting nature of golden hour light can be intimidating, creating a pressure to perform that can block creativity. He understands that for many, the brief window of perfect light feels more like a frantic race against time than a creative opportunity. “I think every photographer remembers the feeling of panic during their first few golden hours,” he says. “The light is perfect, it’s changing every second, and you’re fumbling with settings, feeling like you’re missing it all. The secret is realizing that mastery doesn’t come from being faster, but from being more prepared. It’s about slowing down, having a plan, and learning to trust your creative vision instead of just reacting to what’s in front of you.”
Brown shares his essential tips for capturing and enhancing the spectacular light of summer’s golden hours using the powerful tools within Adobe Lightroom.
Plan Accordingly to Maximize Creativity
To avoid the frantic feeling that many photographers experience when they first begin to document during the golden hour, Brown asserts that having a solid plan is the single most important step a photographer can take. He sees preparation not as a restriction on creativity, but as the very thing that enables it. By handling the logistical work beforehand, a photographer is able to focus on their creative goals when the light is at its peak.
“For me, planning isn’t about removing spontaneity; it’s about removing the panic,” Brown states. “The best images are born from intention, not from luck. When that incredible light arrives, a moment that might only last for a few minutes, you want to be completely focused on creating, not scrambling to find a composition. The goal is to be in the right place at the right time, with a vision already in mind. That preparation is what gives you the freedom to truly see and react to the beauty in front of you.”
Brown’s planning process involves two key phases: digital and physical. He uses apps like PhotoPills to understand exactly where the sun will rise and set, allowing him to predict how the light will interact with the landscape. But he believes there is no substitute for scouting a location in person, ideally well before the golden hour.
“Whenever possible, I’ll visit a location a day or two before I plan to shoot,” he explains. “I walk around, get a feel for the place, and start mentally framing shots. I’m looking for compelling foregrounds, like a patch of wildflowers or an interesting rock formation, and leading lines that will draw the viewer’s eye into the scene. That way, when the golden hour begins, I’m not discovering a location; I’m executing a pre-determined vision.”
Take Full Control with Manual Mode
At the heart of Brown’s photographic philosophy is one non-negotiable principle: taking full creative control by shooting in Manual mode. “A camera’s automatic modes are programmed to produce technically correct exposures,” he explains. “However, my goal isn’t capturing the perfect technically correct exposure in camera; it’s the intentional pursuit of a specific mood, feeling, and story.”
“A camera’s auto modes are incredibly smart, but they have one objective: to create a balanced, middle-of-the-road exposure,” Brown continues. “They see light and shadow and try to average them out. But my job as a photographer isn’t to average the world; it’s to find a specific story within it. Manual mode is the only way to ensure the camera is capturing my vision, not its own interpretation.”
This control is especially critical in Brown’s wildlife photography, where light and animal behavior can change in an instant. “Being able to independently adjust aperture, shutter speed, and ISO allows me to make creative decisions on the fly, prioritizing what matters most for the shot,” he says.
“I remember shooting during golden hour on an overcast day, waiting for birds in flight,” Brown recalls. “I knew I needed a very fast shutter speed to freeze the action, which meant I had to push my ISO to 1600 to get a proper exposure. With my aperture locked at f/5.6 for optimal sharpness and a shutter speed of 1/2000th of a second, the camera’s auto modes would have compromised one of these settings to get the ‘correct’ exposure. But in Manual mode, I could prioritize the motion-stopping power I needed, knowing that Adobe Lightroom’s AI-Powered Denoise would handle any noise in post-processing.”
That confidence comes from shooting in RAW and knowing what’s possible in post-processing. With the powerful AI-Powered Denoise and masking tools in Adobe Lightroom, Brown knows he can manage the technical consequences of his in-field creative decisions to bring his final vision to life.
Shoot in RAW for Ultimate Flexibility
Shooting in Manual mode is only half of the equation for gaining total creative control, Brown says. The other essential piece is capturing images in the RAW file format. “While JPEGs are convenient, they are a finished product with baked-in decisions about color and exposure,” he states. “A RAW file, by contrast, is the unprocessed data straight from the camera’s sensor, providing the maximum possible information for post-processing in Adobe Lightroom.”
“For me, shooting in JPEG is like getting a printed photograph from a lab. The creative editing decisions have already been made for me,” Brown continues. “A RAW file, on the other hand, is the digital negative. It’s the raw potential of the scene, containing every bit of data my sensor captured. It gives me the ultimate flexibility in post-processing to bring the story I envisioned in the field to life.”
This flexibility is most critical when dealing with the high-contrast light of the golden hour. Scenes with bright skies and dark foregrounds often exceed what a camera can capture in a single, balanced JPEG.
“During golden hour, the dynamic range is often extreme,” Brown explains. “A JPEG file will often crush the shadows into pure black or blow out the highlights in a sunset to pure white, and that data is lost forever. With a RAW file, I have the data to go into Adobe Lightroom and pull back those highlights to reveal color and texture, or lift the shadows to show detail that was hidden. It’s not about ‘fixing’ a photo; it’s about having the creative latitude to fully express the scene as I experienced it.”
Furthermore, shooting in RAW means that critical settings like white balance are not permanently baked into the file, allowing for non-destructive adjustments in Lightroom to perfectly enhance the warm or cool tones of the golden hour.
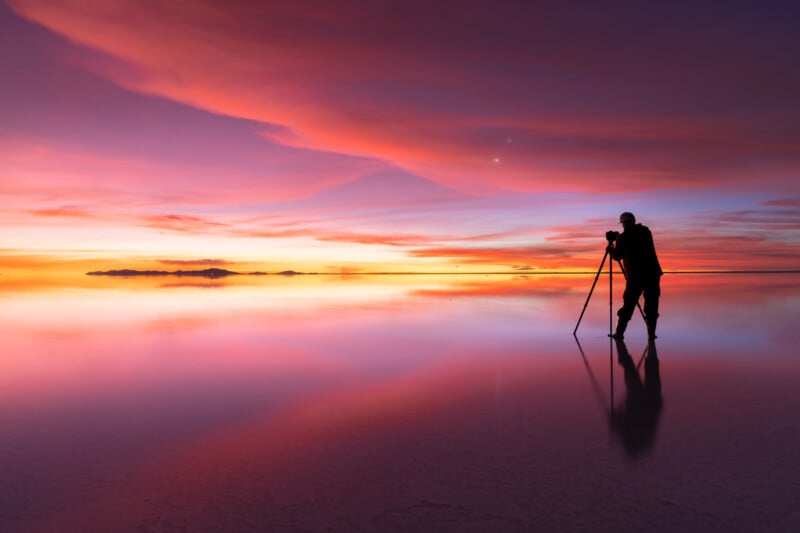
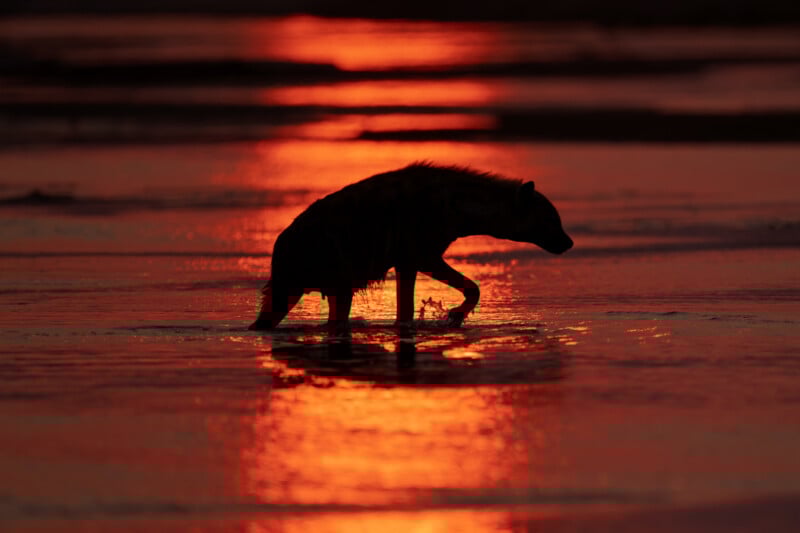
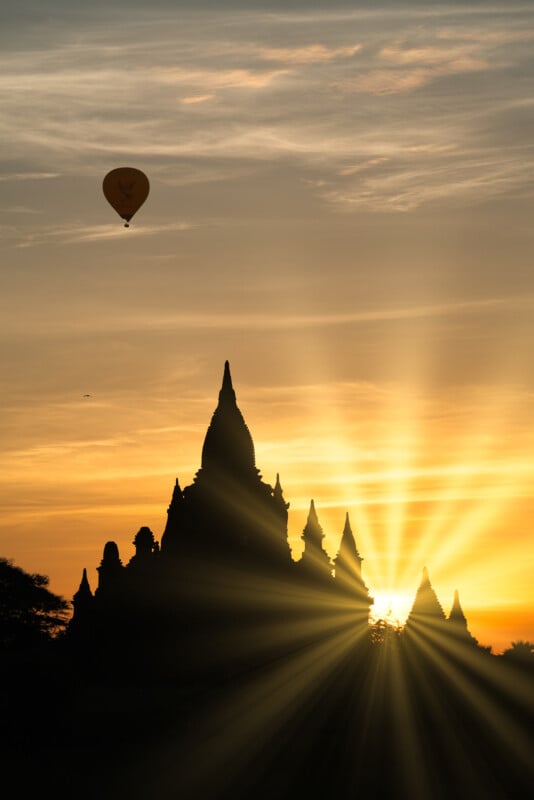
Look for Silhouettes to Create Drama
One of the most powerful tools available to a photographer during the golden hour is also one of the most frequently overlooked: the silhouette. Brown believes that many photographers are so focused on achieving a perfectly balanced exposure that they miss the immense artistic potential of intentionally underexposing a subject. A silhouette is a deliberate creative choice that shifts the focus from the details of the subject to the power of its form against a dramatic, colorful sky.
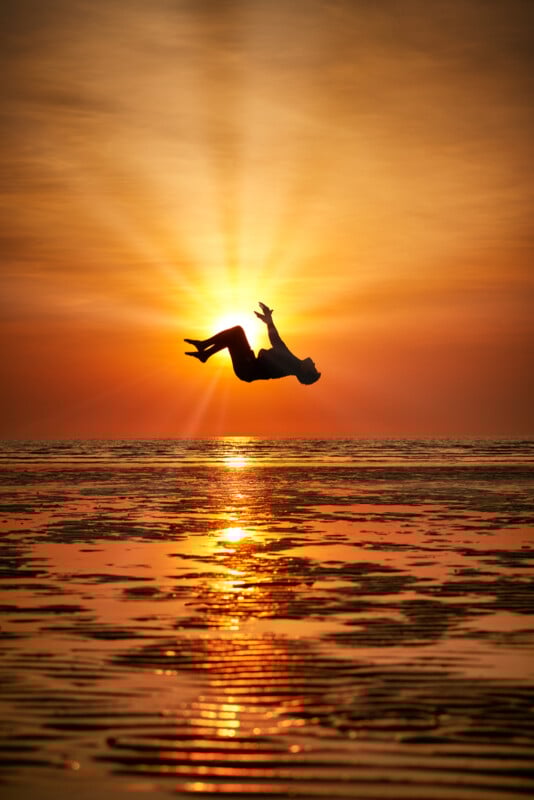
“A great silhouette can often be more emotionally impactful than a perfectly lit portrait,” Brown says. “It strips away the distraction of detail and forces the viewer to focus on the two most important elements of that moment: the raw emotion of the color in the sky, and the subject. It adds a layer of mystery and drama, transforming a simple scene into a powerful statement.”
Achieving this effect requires taking full control away from the camera’s automatic settings, which will always try to correct the scene by brightening the subject. “This is a situation where Manual mode is non-negotiable,” Brown explains. “Since the camera’s auto modes are programmed to find a balanced exposure, which is the exact opposite of what I want, I have to be the one to make the creative decision.” The technique is straightforward: switch to Manual mode and meter for the brightest part of the scene, the colorful sky, which will plunge your foreground subject into a deep, defined shadow.
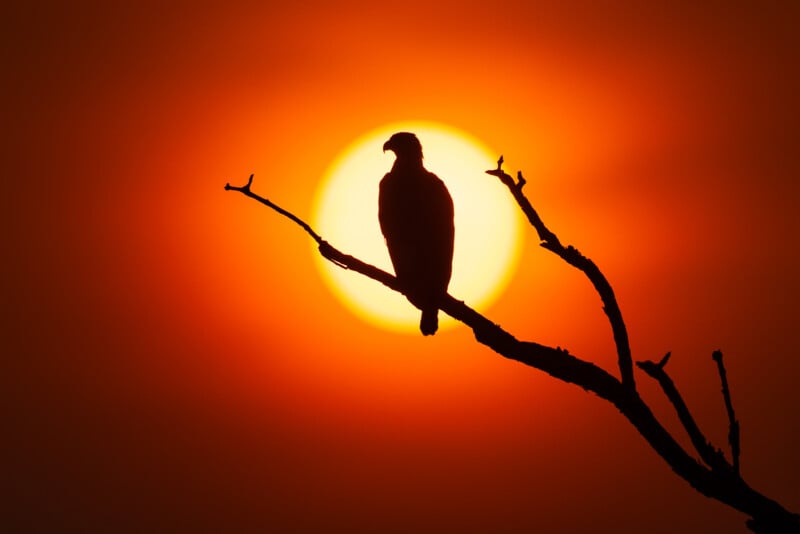
A silhouette simplifies the composition down to its most powerful elements, creating a timeless feel. “By stripping away the specific details of a subject, you sometimes create a more universal story,” Brown notes. “It could be any person or animal on that ridge or any tree on that hill, and that ambiguity allows the viewer to more easily place themselves within that powerful, graphic scene.”
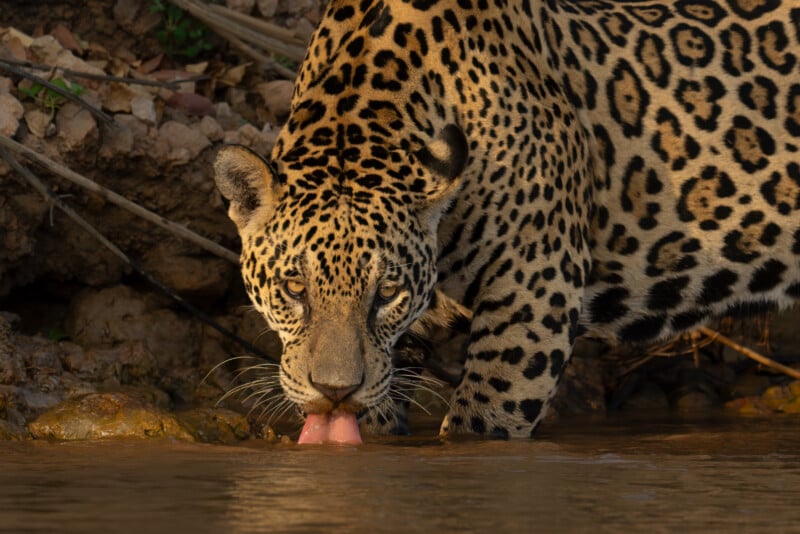
Shoot Wide Open for Subject Separation
For photographers looking to make their subjects pop in golden hour, especially in wildlife photography, Brown advocates for shooting with a wide aperture. “Shooting wide open involves using a low f-stop number, usually the lowest on your lens,” he explains. “For instance, most of my lenses allow me to get a wide open aperture of f/1.4, f/2.8, or f/4, which creates a shallow depth of field, effectively separating my subject from its environment.”

“When I’m photographing wildlife during golden hour, I’ll almost always shoot with my lens wide open,” Brown says. “It accomplishes two critical things at once. First, it lets in a massive amount of light, which is crucial when the sun is low. This allows me to maintain a fast shutter speed to freeze the motion of a bird in flight or a tiger on the move. Second, it creates that beautiful separation between the subject and the background.”
This separation is a powerful creative tool. By rendering the background as a soft, out-of-focus blur, it eliminates distractions and directs the viewer’s attention precisely where Brown wants it.
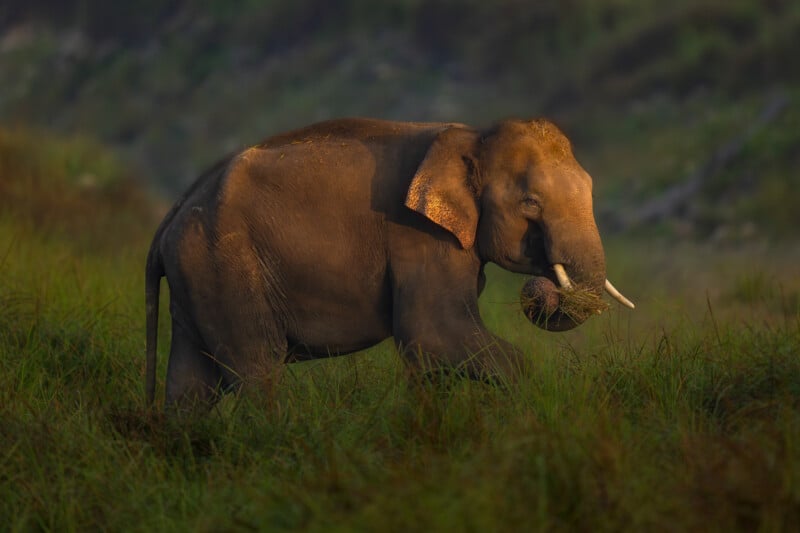
“The effect is that the background just melts away into this soft, beautiful wash of golden color,” he explains. “It’s a powerful way to isolate my subject and guide the viewer’s eye exactly where it needs to go. All the focus is on the animal and the beautiful quality of the light hitting it. It’s one of the quickest ways to give an image a professional, almost cinematic feel, turning a simple portrait into a much more impactful story.”
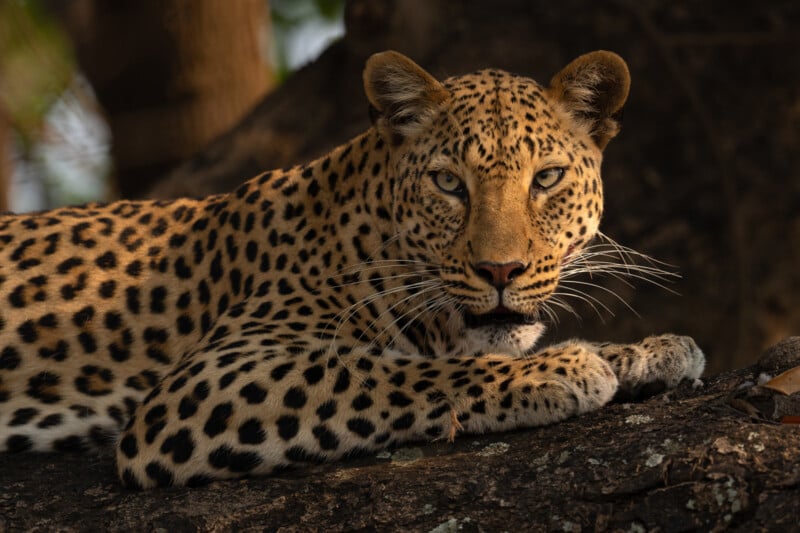
Add a Touch of Fill Light to Backlit Subjects
While a powerful silhouette can create incredible drama, there are times when Brown wants to retain key details in a backlit subject. “For these situations, I use a technique called fill light, which allows me to keep the beautiful, glowing rim light from the golden hour sun while revealing just enough information in the shadows to tell a more complete story,” he says.
“Fill light is essentially a way for me to gently add a touch of light back onto the front of my subject when the main light source is behind them,” Brown explains. “It’s the technique I use when the beautiful rim light is perfect, but I don’t want to lose the details in an engaging foreground element or the texture in an animal’s fur to complete shadow. It’s about finding that perfect balance.”
The most direct method is to use an off-camera flash or a reflector to bounce light back onto the subject. “But that’s often impractical in landscape and wildlife photography,” Brown notes. “You can’t exactly ask a bear to hold a reflector, and more often than not, your subject is too far away for a small flash to have any effect.”

Because of this, Brown’s go-to method is often achieved in post-processing. “My favorite technique is to handle it in Adobe Lightroom,” he says. “In the field, I’ll expose my RAW file so it’s just a little brighter than a full silhouette. For this backlit photo of a lion during golden hour in Kenya, I exposed for 1/400th of a second at f/2.8 and ISO 6400 to retain the rim light, then used Lightroom’s masking tools to lift the shadows while keeping the highlights intact,” Brown explains. “This gives me that perfect balance between the dramatic backlighting and the essential detail in the subject’s features. The key is subtlety. I am not trying to make it look like they were lit with a studio strobe; I am just opening up the shadows enough to reveal that crucial detail, creating a beautiful, balanced image.”
Enjoy a Little Flare
For decades, photographers were taught that lens flare was a technical flaw to be avoided at all costs, however, for Brown, this is a lesson he doesn’t follow. “For me, intentionally shooting into the sun and embracing the resulting flare can be a powerful creative choice, adding a tangible sense of warmth and atmosphere to my landscape and wildlife images,” he states.
“When used thoughtfully, a bit of flare can add an incredible sense of energy and authenticity,” Brown says. “It helps replicate the feeling of actually being there, squinting into the beautiful, low sun. It makes the final image feel more immersive and real, not sterile and technically perfect.”
Brown often uses this technique to create a ‘sunstar,’ a sharp burst of light that can add a dynamic focal point to a landscape. This effect is most pronounced when the sun is partially obscured by a hard edge.
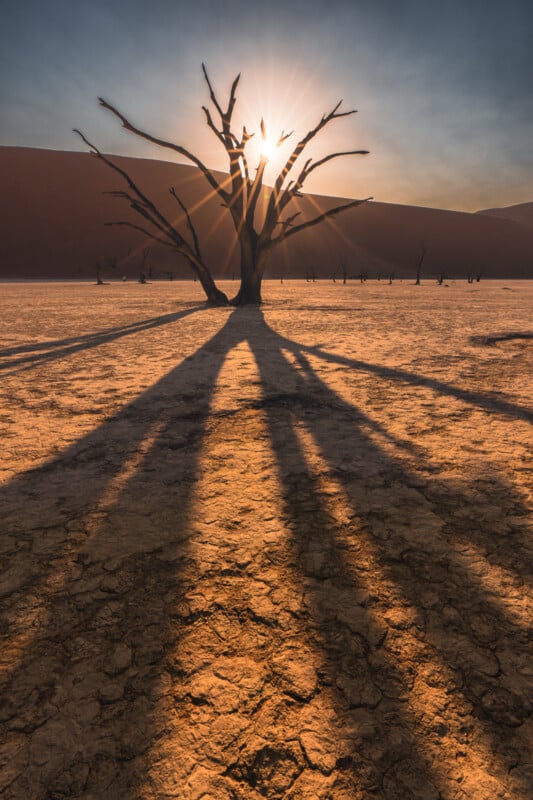
“The sunstar is a specific effect I’ll plan for,” Brown explains. “I look for a moment when the sun is just cresting the edge of a mountain or peeking through the trees. To get that sharp, star-like shape, I have to use a smaller aperture, so I’ll stop down to somewhere between f/11 and f/16. The quality of the lens makes a big difference here, but the core technique is that I am using that high-contrast edge and a narrow aperture to transform the sun into a graphic element within the scene.”
“It’s a technique that requires intention, but one that can transform an already beautiful scene into something truly special,” Brown concludes.
Experiment with Side Lighting to Create Dimension
While most photographers are focused on the quality of golden hour light, its softness and color, Brown argues that its direction is an equally powerful, yet often overlooked, creative tool. “Understanding how to use the directionality of light is what separates a simple snapshot from a dramatic, professional image,” he says.

“We all get excited about the soft, warm quality of golden hour light, but that’s only half of the equation,” Brown states. “The direction that light is coming from is what gives a scene its shape, texture, and dimension. It’s the difference between a flat, evenly lit photograph and an image that feels dynamic and three-dimensional.”
By positioning himself so the light source is to the side of his subject, Brown uses shadows as a fundamental compositional element, not as something to be avoided.
“I think of sidelight as my paintbrush,” he explains. “It rakes across a landscape, revealing every ripple in the sand or crevice in a rock face. In my wildlife photos, I use sidelight to illuminate one side of the animal’s face while letting the other fall into a soft, mysterious shadow. I am creatively using light to define form and create a powerful sense of depth.”
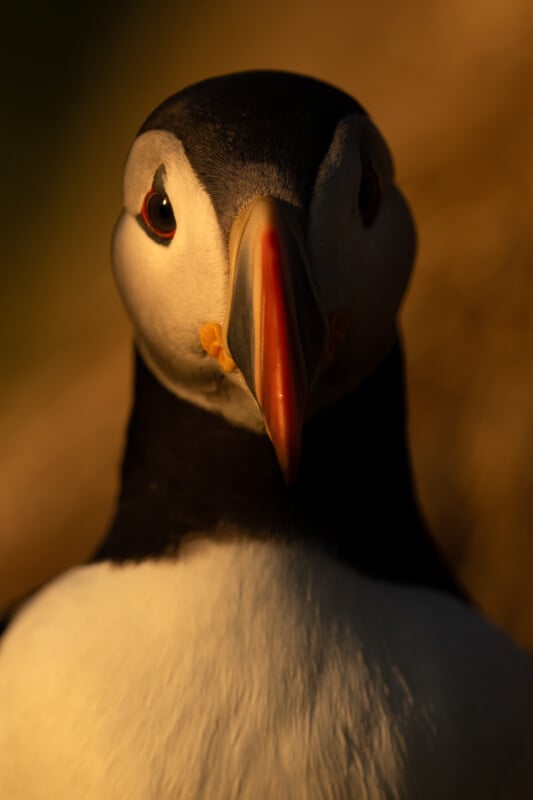
This technique is key to creating a more compelling narrative within the frame, Brown explains. “Front lighting can be beautiful, but it tends to tell you everything at once,” he describes. “Sidelight is more selective. It creates pockets of light and shadow, which builds a more moody, dreamlike atmosphere. It invites the viewer to look closer and makes the final image feel less like a simple record of a scene and more like a deliberate, artistic interpretation of it.”
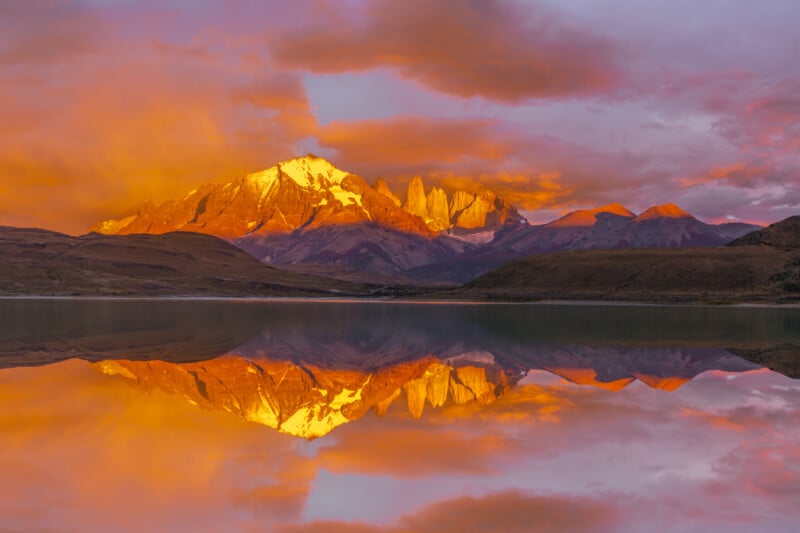
Look for Panorama Opportunities
Sometimes, the sheer scale of a golden hour landscape is too big to be contained within a single file. “For these incredible moments, I love to use one of my favorite landscape photography techniques; the panoramic stitch,” Brown says. “Knowing when and how to create a panorama is a critical skill for my landscape photography when I am looking to do justice to a grand scene.”
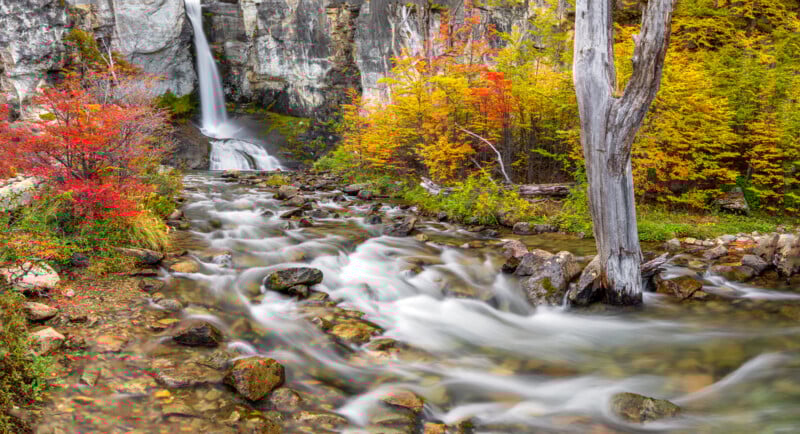
“A panorama isn’t just about making a wider photo; it’s a deliberate choice to immerse the viewer in the full grandeur of a location,” Brown continues. “I turn to this technique when I see a scene with compelling details stretching from left to right. It could be a massive mountain range catching the first light of day or a coastline lit by a fiery sunset. A single frame would feel restrictive, but a panorama invites the viewer to scan the scene and truly appreciate its scale.”
Brown’s technique is methodical. “I always shoot my panoramas with the camera in a vertical orientation, which gives me more height in the final image,” he explains. “I’ll then take a series of shots, overlapping each frame by about a third to ensure Adobe Lightroom has enough data to stitch them together seamlessly using the Panorama Photo Merge feature. A photo I took of Mount Fitz Roy in Patagonia is a perfect example. A single shot would have been compromised by too much empty sky or uninteresting foreground. The panorama, however, captures the entire epic chain of peaks exactly as I experienced it.”
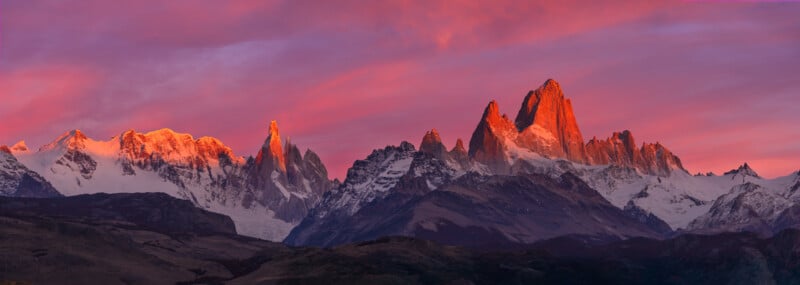
Brown says that the result is not only a more immersive composition but also a file with incredible detail. “The final image has a massive megapixel count,” Brown notes. “This means you can print it incredibly large, allowing the viewer to get lost in all the fine details of that beautiful golden hour light.”
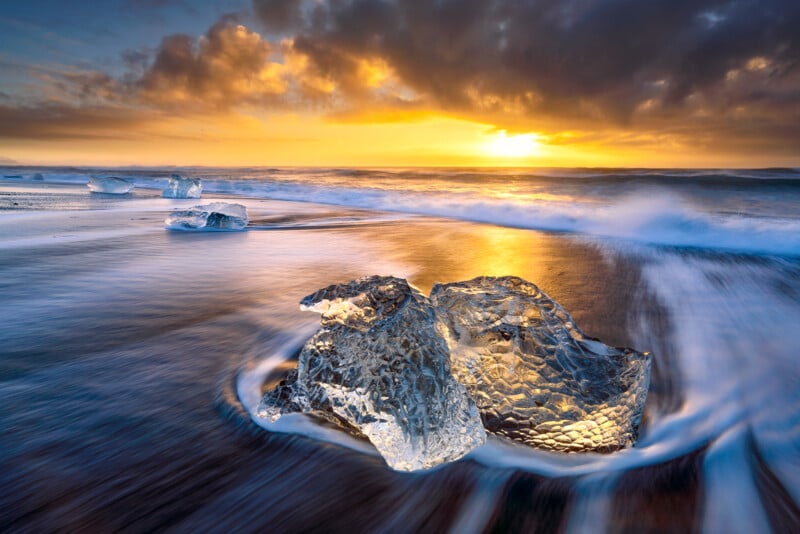
Merge to HDR for Maximum Dynamic Range
Even with the power of a RAW file, some golden hour scenes present a challenge that pushes modern cameras to their limits: extreme dynamic range. For these situations, Brown uses High Dynamic Range (HDR) photography and the powerful tools in Adobe Lightroom to create a single image that captures detail from the brightest highlights to the deepest shadows.
“There are moments, like a time I was photographing in an ice cave in Iceland during the summer solstice where the difference between the bright sky and the dark foreground is just too great for even the best camera to capture in one shot,” Brown explains. “Our eyes can see the detail in the deep shadows and the brilliant highlights simultaneously, but a camera can’t. HDR is the technique I use to bridge that gap, allowing me to create an image that more accurately represents the incredible range of light I witnessed in person.”
The process begins in the field with a technique called exposure bracketing. “I’ll capture a series of images, usually three or five, at different exposure levels,” he says. “One is exposed for the bright highlights in the sky, one for the dark foreground, and one for the mid-tones.”
Back on his computer, Brown uses Adobe Lightroom to combine these exposures. “I import the bracketed shots and use the HDR Photo Merge feature,” he continues. “Lightroom intelligently combines the best parts of each photo into a new RAW DNG file. This gives me a single, super-flexible image with an incredible dynamic range to work with. It’s not about creating an over-the-top, unnatural look; it’s about having the maximum amount of data to create a beautiful, believable final photograph.”
However, Brown emphasizes the importance of restraint when working with HDR. “The goal is never to create something that screams HDR photo,’” he cautions. “I use HDR to capture what my eyes actually saw, not to create a hyper-saturated, over-processed image that looks artificial. If someone can immediately tell it’s an HDR photo, I’ve probably pushed it too far. The technique should be invisible to the viewer, serving the story rather than becoming the story.”
Guide the Eye with AI Masking & Local Adjustments
For Brown, capturing a great photo in the field is only the first half of the creative process. “The final, critical step to crafting an impactful image is moving beyond global adjustments and using local adjustments in Adobe Lightroom to guide the viewer’s eye and perfect the story,” he says.
“A great photograph is rarely a single, uniform scene,” Brown explains. “It’s a collection of elements like a bright sky, a shadowed foreground, and a specific subject. Each element needs to be treated individually to tell a cohesive story. This is where masking comes into my Lightroom workflow. It’s the process of selecting a specific part of my image so I can adjust it independently from everything else.”

For years, this meant a meticulous process of using tools like the Linear Gradient or Adjustment Brush. But with the evolution of Adobe Lightroom, this process has been revolutionized by AI-powered masking, which dramatically speeds up the workflow.
“The AI masks are an absolute game-changer for my workflow,” Brown says. “What used to take me many minutes of careful brushing, I can now do with a single click.” Recently, Adobe unveiled the AI-powered Select Landscape Mask, which simplifies editing by automatically selecting and creating masks for common elements found in landscape photos, such as sky, mountains, and vegetation. “These masks allow me to instantly isolate parts of my image and make targeted adjustments, like darkening a sky to add drama or brightening a subject, like a mountain range, to make it pop. It’s an incredible time-saver that lets me focus on the creative choices, not the tedious selection process.”
For the ultimate level of control, Brown uses Lightroom’s Point Color tool within a mask. This feature allows for hyper-specific color adjustments that are perfect for the nuanced light of the golden hour. “Point Color lets me be incredibly precise,” he states. “During golden hour, I can select the sky, then use Point Color to target just the orange tones and subtly increase their saturation and luminance, without affecting the nearby reds or yellows. It’s a level of granular control that is essential for getting those sunset colors to look exactly as I remember them.”
Ultimately, the techniques for capturing the golden hour are about more than just light. For Brown, they are tools of translation, designed to bridge the gap between a fleeting moment of beauty and a lasting story. It’s about moving beyond the technical to capture the feeling of a place.
“Every lesson that I have learned that I incorporate into my golden hour photography, like planning, shooting in Manual, and editing in Lightroom, is assisting me to accomplish my ultimate goal, which is to remove the technical barriers between my eye and my creativity,” he concludes. “Incorporating these lessons into my workflow both in the field and in Adobe Lightroom gives me the freedom to stop thinking like a technician and start thinking like an artist. The golden hour isn’t just a time of day; it’s an invitation to see the world with a little more wonder. And I accept that invitation as often as I can.”
Colby Brown is a Sony Artisan and photo educator who leads workshops to destinations such as Kenya, Patagonia, Costa Rica, and India. More from Colby Brown can be found on his website and Instagram.
Full disclosure: This article was brought to you by Adobe
Image credits: All photos by Colby Brown